Beginner's Guide

Beginners Guide Part 2: Layout Planning

Layout planning takes vague dreams of a model railroad to a track plan which can be built.  Our earliest plans might have simply been an oval of sectional track on the floor or sheet of plywood.  We might have bought a crossing for a figure eight and turnouts so we could have spurs with perhaps a passing siding to allow us to run around our train and run two trains in opposite directions.  With time we might acquire more space, become involved in a modular group or a club planning a layout, or simply want to up our game as we learn more about the hobby.


One place to begin is to find a layout plan in a magazine, book, or online, and build it as designed or modified to meet preferences and fit in the space available.   Studying published layouts can help you decide what features you like best, what works and what does not for your space, time and budget.
 
Eventually, however, you want to develop your own design that fits your goals and resources perfectly, and that is what we will help you with here.  This part of the Guide has three parts: an overview of the layout design process from that vague idea to a detailed plan; a presentation of best practices for a successful model railroad design; and a list of written resources to help you along.
 
 
If you are unfamiliar with some of the specialized terminology we use, here is a glossary on the NMRA website: https://www.nmra.org/beginners-glossary
 

Overview of the Layout Design Process

These are the planning steps that will be described below:
  • Step 1 – Capture your goals and resources
  • Step 2 – Prioritize the ideas and start to design trackwork
  • Step 3 – Add size and detail to the ideas to create a schematic or rough draft
  • Step 4 – Draw your track plan in sufficient detail to allow building benchwork and laying track
The steps are often repeated as you may need to go back to a previous step or steps and change the draft plan and take that forward to the next step.
 
Step 1: Goals and Resources
Establishing goals will help you focus on what is most important to you and will guide you in modeling what is in your mind's eye.  Your goals do not have to be hard and fast and might change when you consider practical issues such as time, space, and finances.
Ask yourself:
  • Am I interested primarily in running trains over a mainline or in switching?
  • Do I want continuous running or the capability to run point to point, maybe with continuous running an option for open houses?
  • Am I interested in operations?  In other words, simulate prototype railroad operations.
  • Do I plan to run the layout largely by myself or do I want to invite fellow hobbyists?
  • Do I want to freelance or to replicate a prototype?
  • Am I interested in a particular place and time?
Then move on to practical issues:
  • What is the available space?
  • How much time do I have to devote to building my layout?
  • Do I want it to look complete in a short time or will my vision need years to accomplish?
  • What is my budget?
  • Do I have friends who can help me build?
Probably foremost on the modeler's mind when starting on a new layout is the question of a place to put it.
 
How much space is available? We all dream of a railroad empire, but the first dash of reality comes as we measure the room where the empire will be built.  Sometimes the available space is actually the length of a wall or less.  Designing layouts in a small space has its own set of challenges, see here for some tips:
https://model-railroad-hobbyist.com/magazine/mrh-2014-09-sep/minimum-space-layouts
 
For a room-size layout, is it to be around the wall or an island?  The layout can run around the perimeter of your room, perhaps with peninsulas into the middle of the room, or it can be built in the middle of the room.  Layouts around the perimeter are usually the most efficient for space.
 
How many openings to the room must be accommodated?  The number and locations of doors are particularly critical in planning a layout and can determine whether it is to be an island or around-the-wall configuration.  For an around-the-wall layout, windows may sometimes be blocked but doors will require a duck under or a section of the layout that can be moved in some way, usually a hinged gate.  Duck-unders may present a physical barrier to many physically challenged or older folks.  Hinged gates or even a detachable roll-away portion must be constructed precisely to operate reliably.  Related to openings to the room is whether the room has other features that must remain unobstructed, such as closets in bedrooms, hot water heaters, heating and cooling systems, and electric panels in basements.
 
Of course, you do not need to cross the door if the layout is point to point.  For a continuous run, the track can turn back on itself.
 
Will the layout be permanent or portable? Permanent means merely that the layout once built is intended to remain in one spot.  If there is no space to devote exclusively to a layout, a small layout might be capable of being moved out of the way.
 
Layouts can be designed for the owner to display at a train show or some other venue.  This is done rarely by individuals in the US but is not unusual for clubs and in other countries.  In this case, the layout consists of modules or sections and the size can be dictated by storage space.  Individuals might opt to build a home layout in modules when the probability of a move is high.
 
Throughout this discussion, we have assumed an indoor layout.  However, many of the same questions apply to outdoor layouts, generally called garden railroads.
  • How much space do I have?
  • What are the required points of access from the house and perhaps other parts of the property?
  • Will the line go around the perimeter of a fenced-in or otherwise physically defined area or will it form an island in a lawn or garden area?
  • Will structures be weatherproof or needing to be taken up and moved back indoors?
Step 2 – Prioritize and Start Designing Trackwork
At this stage, you should have taken a good hard look at the space available.  The next step is to create a drawing of this space, presumably to scale. In fact, draw it as large as you can.  Drawings can be made with pencil on paper or on a computer using software designed specifically for model railroaders.  For instance:
Some programs allow for printing 1:1, are helpful for designing complex trackwork, and useful for identifying where grading is required for outdoor layouts.  You can use a general drawing or computer-aided design program, but specialized model railroading applications have tools and features such as libraries of templates for turnouts.


You can start to sketch track plans on your scale drawing, but you will want to move to drawing track plans to scale as early in the process as you can.  Freehand track layouts tend to be overly optimistic in the quantity of track that can be fit in a given space and we all fudge the track radius and space taken up by turnouts.
 
There are several concepts and techniques for deciding how much space is required for the track plan and how much is to be devoted to scenery and buildings to provide the context for train operations.
 
Layout Design Elements, or LDE’s, have been described by Tony Koester as visually and operationally recognizable elements of the prototype that you want to model in some detail.  For example, an LDE for a small industry might include tracks for serving the industry as well as the mainline track and space for structures.  A small town LDE might include a passing siding, a team track, and a mainline track in addition to a depot.  Other examples are the junction between a branchline and the mainline; classification yard; rail to water transfer; engine service area; and balloon track used to reverse trains in a large terminus.
 
Prototype track configurations provide ideas for LDE's, such as this one for a small yard, engine facilities, and a coal transfer trestle.


If you are building a freelance railroad, realize that LDE's do not have to follow a specific prototype but can mimic prototype practices.  Sanborn maps https://en.wikipedia.org/wiki/Sanborn_Maps and Google Maps can help.
 
Layout squares by John Armstrong help you to design the places in your layout where the track must curve, such as in a corner and at the end of a peninsula.  A track planning square contains a 90-degree curve of your minimum curve radius, the next larger curve radius, and the curved track clearance.  It provides a realistic and accurate schematic for how much space is actually taken up by sections of curved track.  Of course, curves can be broader in the final plan if there is space.


Dominoes is an idea by David Barrow which combines track planning with benchwork design.  Using this approach a layout is planned as a series of sections or modules of open grid benchwork typically 2 x 4 feet in size that bolt together.  Significant features such as yards will require several dominoes.  In his style of layout there are no elevation changes; long, straight sections of track parallel the front edge; and the only curved sections are where tracks negotiate corners.  The designer could use the concept of the LDE for individual modules and groups of modules.  This approach is most appropriate for people planning principally toward operations.   This concept has evolved over time from a way to plan benchwork as a series of modules to a way of thinking about the layout planning process.
 
The One Module Approach or TOMA, like dominoes, views a layout as a collection of modules, in this instance built one at a time, pretty much fully realized before progressing to the next module.  The builder starts with a single small module with simple staging at each end, thus motivating the modeler who finds the prospect of planning and building a model railroad empire overwhelming.  This approach was developed and described by Joe Fugate:  http://mrhpub.com/2017-08-aug/online/?page=22
 
Bubble diagrams are used by architects and other designers to get ideas down quickly on paper as a precursor to drawing a detailed plan.  (See for instance: https://www.papergardenworkshop.com/blog/designing-your-garden-bubble-diagrams.)  It can be a way to put the main features you want in a layout down on the scale drawing of your room without actually committing to drawing track.  Here is an example of a bubble diagram for Scott Perry’s Heart of Georgia layout  http://hogrr.blogspot.com/


Step 3: Add dimensions and Detail
How can you use these approaches to begin designing a layout?  You should start with that accurate drawing of your layout space.  Identify areas for features you want to include on your plan, such as a small town, industrial area with lots of switching, a yard, a junction between two lines, and so forth.  Draw these ideas as bubble diagrams or do a sketch like this:


You could sketch in some proposed benchwork, using layout squares in corners and the beginnings and ends of peninsulas.  Meanwhile, you can convert some of the ideas expressed as bubbles into layout design elements.  In fact, you could draw proposed LDE's on a separate page, cut them out, do the same for layout squares, and move these squares and rectangles around on your scale drawing to test out ideas.  If you find building the layout as a series of modules appeal to you, think in terms of dominoes.  TOMA suggests a starting point for building, perhaps to test out ideas and hone your skills.
 
Although the schematic is focused on the track plan, also think about how structures, roads, and other scenic elements will fit.  For example, which tracks must have sufficient separation to provide room for the depot and possible freight house.  As you decide where you want to place structures the track plan may need modifying.  For example, moving an industrial spur.
 
Step 4: Create a Detailed Track Plan
The final step is to draw a complete track plan with accurate track radii, turnout dimensions, track spacing, and grades, as well as LDE's, the mainline with sidings, branchlines, staging, yards, resulting in something like a blueprint for construction:


But hold up for a second.  Moving from a rough sketch to a final track plan needs a few questions answered.  For example: What track radius should you use in drawing layout squares?  How much room do you need for an LDE?  What about changing elevation?  What tracks should a classification yard have to work efficiently?
 

Best Practices for Layout Design

You want your layout to run well mechanically, function well operationally, and look good.  By running well we mean the equipment runs smoothly and can negotiate curves and grades.  Functionally efficient layouts satisfy your goals for the type, frequency, and size of trains you want to run, as well as the types of work you want to do, such as switching or running mainline trains, while avoiding operational headaches.
 
Best Practices for Good Running: Let's start with the mechanical aspects.  You want to establish a minimum track radius.  This is obviously constrained by the available space.  The smaller the radius the more track we can fit.  But it also depends on the era you model, type of trains, the nature of your equipment, length of your trains, and the setting.  Locomotives and rolling stock in the early days—let's say before 1900—were relatively small, and look right and run well on small-radius curves.  The same goes for narrow gauge railroads, which in the real world were engineered to conserve space and to allow for smaller radius curves.  In contrast, late steam locomotives, modern diesels, double stacks, and auto racks look best and run more reliably on track of larger radius.  Long trains look bad and can derail on overly tight curves.  One rule of thumb is that the longest reliable operational train is around three-quarters of the circumference of a circle of your layout’s minimum design curve radius.  For example, a 27-inch minimum radius gives about ten feet of train length.  Broad sweeping curves seem almost mandatory for mainline running on the American prairies, but tight curves look good and add to the personality of a logging or mining railroad in the mountains, whether standard or narrow gauge.
 
The radius affects the look and performance of longer equipment.  Twentieth-century passenger cars overhang too much on small-radius curves to look good or track well.  Same for locomotives: an Allegheny does not work on a 20” radius track in HO.  Garden locomotives can require 5 feet and you can find some great information here: http://www.usatrains.com/usatrainslocogp7.html.  The NMRA Recommended Practice RP-11 Curvature & Rolling Stock is an excellent overall guide: https://www.nmra.org/track-curvatures-rolling-stock.
 
Plan easements, smooth transitions between straight and curved stretches of the track rather than abrupt transitions from straight to your minimum radius.   From a straight section of track have it gently curve and gradually decrease in radius to the radius you want.  Similarly, curves should gradually increase in radius.  In fact, your equipment might tolerate a somewhat smaller minimum radius if you have easements.  Trains look better if they don't suddenly jerk as they go into a curve or meet a tangent.  Also, note that if you do need to use a sharp curve and have a choice where to place it, viewing it from the inside of the curve reduces the unsightly effect.  For more on easements look here: https://www.trackplanning.com/easements.htm and here: https://www.nmra.org/sites/default/files/d3b3.pdf.
 
What size of turnout (switch) should you use?  Turnouts come in several sizes, small no. 4, medium no. 6, and so forth, depending on scale, rail size, and brand.  Smaller sizes reduce the space required for switch ladders in yards, whereas the larger sizes look better on the mainline and are less likely to cause issues with long rolling stock.  The larger sizes require more space and the builder must often compromise.  Many manufacturers provide templates for purposes of track planning, and model railroad planning software has different sizes in their track libraries.  However you draw your refined track plan, make sure you allocate sufficient space for each turnout.  You will most likely be surprised how much room that idea you drew on the back of an envelope takes in reality.
 
The same applies to spacing parallel track.  NMRA Recommended Practices RP-7 Track Centers and Obstacle Clearances provides guidance for track spacing as well as clearance for bridges and structures: https://www.nmra.org/sites/default/files/standards/sandrp/pdf/rp-7_track_centers_and_obstacle_clearances_july_2017.pdf
The NMRA Standards gauge is regarded by many as essential while planning and building a model railroad.  It is used to check the clearance between trains on the track and adjacent structures as well as the clearance between trains on nearby tracks.
 
The length of Grades must be taken into consideration in your track planning.  Make sure grades are reasonable, with room for smooth transitions at the top and bottom of the grade i.e. vertical easements, and sufficient clearance where one track goes over another.  Anything more than a 2% grade will significantly impact the performance of your locomotives and limit train length.  Again, era and setting can suggest the degree and magnitude of changes in elevation.  A challenging grade requiring splitting trains or helper service can be used to your advantage if you want to add operational interest.
 
Here are a few more tips to keep in mind:
  • A long train sweeping through an “S” curve looks impressive, but such curves can cause derailments.  If the straight distance between the curves is too short, the couplers on your rolling stock might not have sufficient side swing to accommodate the differing side movement of the ends of adjacent vehicles.  A good rule of thumb is to separate the reverse curves of an “S” curve by a length of straight track longer than your longest vehicle fitted with body-mounted couplers.  Also, be aware of “S” curves formed from adjacent turnouts.
  • Because coupling rolling stock can be a challenge on curves, use straight track or broad, sweeping turns in areas such as yards or industrial spurs if at all possible.
  • Build the benchwork to an appropriate height.  Viewing the model railroad at eye level helps make it appear more realistic, but that level is too high to work on comfortably.
  • Leave some space between track and layout edge for scenery and safety of the equipment.
  • If you build a layout with multiple decks, allow sufficient clearance between decks for access and maintenance.
  • Provide sufficient width of aisles, especially if you plan to host operating sessions.  A rule of thumb for aisle widths is 24 inches for single access, 36 inches for co-located operators (900 mm wide accessways and 1,200 mm wide operating areas).  To prevent interference between operators, it's usually a good idea to avoid having areas of intensive switching opposite each other on a narrow aisle or one above the other on a multideck layout.
 
 
  • Ensure you can reach everywhere for layout maintenance.  For emergency access to an out of reach part of the layout, provide an access hatch, a hole in the benchwork, and scenery which is sometimes concealed with a lift-out section of scenery.
Best Practices for Good Operations: A well-functioning layout has sufficient yard space, passing sidings, run-around tracks, and other elements to make for the efficient and realistic operation of a model railroad.  Specific LDE's depend on the purpose of the railroad in the mind of the owner.   Whether the purpose is to expeditiously run freight from one end of the railroad to the other, simulate car classification and train-building activities, drop off and pick up cars in a busy industrial district, or any other purpose, the railroad to work must follow certain practices and adhere to standards.
 
If you want to run more than one train at a time, you will need to provide passing sidings so that one train clears the mainline to accommodate a train coming from the opposite direction or an overtaking train of higher priority. To avoid operational headaches, ensure that your passing sidings are at least as long as the longest train you expect to run.  You could plan a double-track mainline, but this is a space-eater that decreases the apparent size of a layout.  In addition, a single-track mainline adds an operational interest that simulates that of an actual railroad.  Of course, a double mainline may be appropriate for a very large layout that is trying to capture the look of a major railroad prototype.  Passing sidings double as runaround tracks for switching areas.  The engine doing local switching can work without occupying the mainline except for runarounds.  The need for a switcher to vacate the siding when two trains are scheduled to meet adds operational variety.
 
There are too many types and designs for yards to be described in detail, but a common feature on medium to large layouts is a classification yard.  Yards can be designed to be efficient and fun for the operator.  The primary rule is to provide enough tracks for the person doing the switching to be able to stay off the mainline for most of the switching moves, perhaps only when the locomotive must run around the train.  In addition to classification tracks, you want an arrival/departure track to break down the train and assemble a new one, and a switching lead independent of the mainline.  Here is a very simple yard that, although small, should be efficient to operate.


Double-ended yards allow two people to work, but they take up a lot of room and are appropriate for only the largest model railroad.  That is unless your greatest enjoyment is in breaking down and building trains and you want your classification yard to occupy a large part of your layout.
 
Note that yard ladders should ideally be built with the shortest track nearest the aisle where the person stands while switching and the longest track towards the back.  This arrangement makes it possible to see the first one or two cars on each track for reading car numbers and for coupling and uncoupling.
 
To give your layout purpose, you will need an origin and a destination for your trains.  One of the goals of staging is to give the illusion that the visible layout is a part of a larger system.  There are several ways of doing this:
Looking Good: As you work on your design, step back occasionally and ask yourself: “Does it look good?”  Whether a model railroad looks good is hard to define and is very much the decision of the designer/builder.  The discussion above points out in several places that well-designed trackwork both runs well and looks good.  Looking good is a function of both the static appearance of a scene or trackwork and the dynamic appearance of a moving train, including mainline running and switching.  This section will touch only briefly on the aesthetics of layout design because, again, much depends on the vision of the layout owner.  Ask yourself: “Does it look 'railroady'?”
 
You can learn much from books, magazine articles, Internet blogs, online discussion groups, and one's own observations of railroading.  Ask yourself what appeals to you and why.  When you turn to your own design, there are some generally agreed-upon practices that improve the looks of the layout.  Many of them are described in the resources listed below and won't be listed here.  A few examples are:
  • Build broad sweeping curves rather than long straight stretches of track.  They look more realistic and make the layout look larger.
  • Avoid straight sections parallel to the front of the layout to de-emphasize the edges.
  • Avoid having tracks at different elevations in a scene run so close that they create the need for a sheer cliff or high retaining wall.
  • Provide sufficient room for buildings and scenery appropriate to the look you want to achieve.
You can check your plan by making a physical or virtual three-dimensional mockup of track, scenery, and structures.  For example, construct a one-fifth scale model on a sheet of plywood the shape of the space the layout will occupy.  Mockups help you see whether the layout can be built, whether there are problems of clearance, and whether scenes are going to look right.


As you look at your design, ask yourself whether it is consistent with the prototype you are modeling or, if you are freelancing, consistent with the type of railroad you are modeling.  A large part of model railroad planning and construction requires compression, but this can go too far.  You might be better off with one large industry than two unrealistically small industries on a spur.  The temptation to reduce track radii to fit in more track is strong, but to an extreme, this only looks good when representing urban switching districts.  Finally, ask yourself whether it fits your vision, you have the resources to build it, and whether it looks “railroady.”
 

For further Information

Websites and online discussion groups provide resources for ideas and plans as well as critiquing plans.  For example:
Videos
Books

Beginners Guide Part 1: Getting Started

Getting started – good advice for any beginner
 
In the Beginning
Some people get started in model railroading at a young age when a train set is received as a gift.  Others get into the hobby after seeing an exhibit at a show held at a local hall or exhibition center.  Some modelers focus on animation, others on scenery.  Some are intrigued by railroads of a bygone era; others like to build models of the latest diesel locomotives.  In the case of members in the British Region, they might have got interested in North American railroads after some years modeling British or European railroads.  Whatever their interests, and however they got started, all have one thing in common — they were once beginners.  And, like those who are likely to read this guide, they had questions.  Some longer-standing members may still have questions.
 
Now that you've decided to embrace model railroading as a hobby, what's next?  There is a bewildering amount of information and vocabulary to absorb and digest, both from the real world of railroads and our model trains.  The number of products available in the hobby is staggering and has evolved much over the past decade or so.  As you read this section of the Guide, don't assume that the content represents all the answers; this section is simply a place for you to start.  And also remember, that the things written here are not cast in stone; there are as many techniques as there are hobbyists.  Advice should be used as a guideline, never an absolute.


Several specific model manufacturers are discussed in this section, but there are many other fine products on the market.  Don't feel limited to the products mentioned here.  The brand names and products discussed will provide the beginner with a firm foundation in model railroading.  Other products and manufacturers not listed will add to the pleasure of the hobby as you discover them.  Seek out several opinions before plunging in.
 
The ultimate goal for many model railroaders is perhaps a finished, permanent layout that can be visualized as a complete miniature world.  Others may want an exhibition layout or a modular setup they can take to meets and shows.  As with any well-rounded hobby, one needs to learn the basics.  In this age of instant gratification, a hobby like model railroading can be frustrating since everything may not come at once but is rather learned over a lifetime.  This depth is what makes model railroading a lifetime hobby.

Choosing a Scale
One of the first decisions you will make is choosing a scale.  Scale refers to the size of the models.  Scale determines the products available, the difficulty of modeling, and how much space your model empire will require.  Although there are many sizes, there are six major scales — Z, N, HO, S, O, and G (formally known as large scale).  These tags are the industry-wide labels that almost all manufacturers use when describing their products.

 
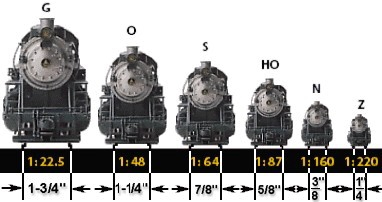
Each scale has advantages and disadvantages.  There are also narrow-gauge subsets of some of these scales (see below).  Z-scale is the smallest, next is N, HO, S, then comes O, and finally "Large Scale" such as G.  Scale is a measure of the size of the model relative to the real thing (real trains are often called "prototype" by hobbyists).  One foot in the real world equals about 1/8" in HO-scale (Half of O), which has a ratio of 1:87.1.  N-scale is 1:160; S-scale is 1:64; O-scale is 1:48; and large scale (G) is 1:22.5, though this varies as there are large scale models in scales other than G.  Since scale directs many of the other paths in model railroading, pick your scale carefully.  (Some modelers can never decide and have chosen several scales!) If possible, visit a train show or see a modular layout set up at a meet or visit someone's layout and witness firsthand the various scales.
 
Since the majority of modelers are in HO, this has benefited the HO modeler with an abundance of products.  Next in popularity comes N-scale, with a corresponding decrease in the variety of products.  O-scale is large in size, a plus when modeling since the pieces are bigger! But there are fewer products available.  Finally, G-scale has been growing in popularity.  It's the only scale that can be reliably run outdoors!  Many modelers choosing G-scale combine gardening with model trains, a great way to share this hobby with the rest of the family (and maybe introduce a neighbor as well).  Subsequent parts of this series will look at each major scale.
 
One scale not mentioned much thus far is S-scale.  S scale has a smaller, but dedicated group of modelers.  It has fewer “off the shelf” products than some of the more popular scales and many S-scale modelers are terrific scratch builders.  (Scratch building is the art of making a finished model from raw materials, instead of starting from a kit.)  As a beginner, you will have to choose if this scale is for you.
 

A scene from Gaylord Gill’s Buffalo & Chautaugua S-scale Railroad

 
You will also encounter the term "gauge" in your search for the best scale. Gauge refers to the distance between the rails.  Standard gauge (4' 81/2" between the rails) is the gauge most modern prototype railroads use.  If models don't mention a gauge, it is safe to assume standard gauge.  The other gauge to deal with is narrow gauge.  (More information on narrow gauge modeling can be found in Part 12 of this Guide.)  Typically, prototype narrow-gauge railroads used either two-foot, two-foot six, or three-foot gauge.  In model railroading, folks refer to these trains by a suffix added to the scale.  For example, in HO-scale, there is HOn3 which implies a model using a three-foot spacing between the rails.  HOn30 is 30 inches gauge.  On30, and to a lesser extent On3, has become popular over the past decade due to increased manufacturer support.  HOn3 is following a similar route.  There is also Nn3 but there are few manufacturers supporting it; Sn3 is supported by specialist manufacturers – for example, see PBL at https://www.p-b-l.com/.  As you can see you can model narrow gauge in all of those scales except Z.
 
Eras and Equipment
Today, the serious model railroader usually chooses an era to model.  Common eras are pre-1900 (the earliest days of railroading), 1901-1930 (steam engines ruled), 1931-1945 (the "golden age" of railroads), 1946-1960 (transition from steam engines to diesel), 1961-1980, and 1980s to the present (modern).  As you do a little research you will eventually gravitate to an era that catches your interest.  The same goes for choosing a prototype railroad to model.  There were many, many railroads in the history of trains.
 
Searching for Information
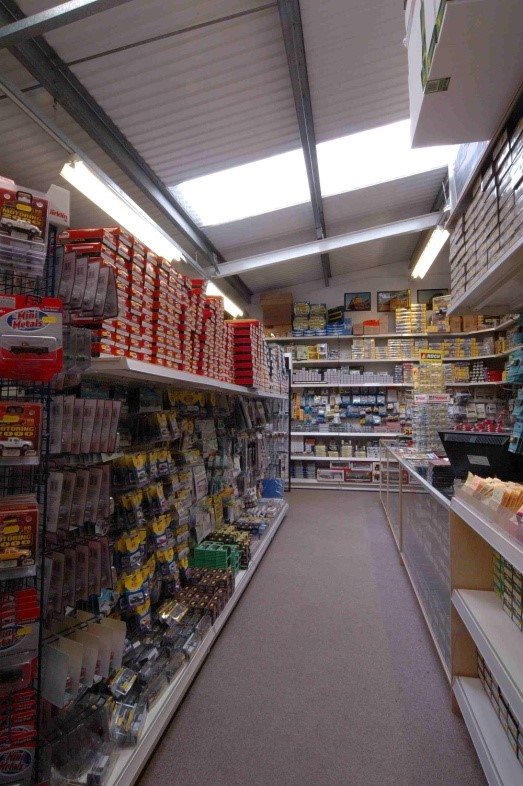
Once a scale has been chosen, the paths in model railroading become much clearer and more defined.  However, there are a number of ways in which information on what you might model can be obtained.  If you have a hobby shop near you, that is a great place to start.  As with all types of information, searching the Internet is also one of the first things you will want to do.   Printed catalogs, like the Walthers’ Catalog, are great resources, too.  If you have chosen a particular prototype railroad to model, see if they have a related historical society.  They are often great sources of information as well.


Many retailers have moved to the Internet and provide online catalogs for browsing and making purchases.  Retailers and manufacturers display and sell at train shows and exhibitions.  These are excellent places for beginners to see products first hand.  One of the largest train shows is the show held as part of the annual NMRA Convention.
 
Magazines are a great resource for learning and news/reviews.  Included in the pages of these magazines are articles for the beginner to the advanced modeler, prototype information, and new products.  Members of the NMRA can subscribe to The NMRA Magazine.  The most popular commercial magazine, and good for the beginner, is Model Railroader, published by Kalmbach, which can be obtained close to the date of publication via subscription.  It is also available on the shelves of many retailers, albeit about four to six weeks after publication.  It can also be obtained on subscription in the UK from Bill Hudson Books of Matlock.  Kalmbach offers many of their titles as an electronic download too. 


Other magazines include Railroad Model Craftsman published by White River and a free online magazine called Model Railroad Hobbyist.  (See http://model-railroad-hobbyist.com/)  N-scale magazines are also available: N-Scale and N-Scale Railroading.  O-scale magazines include O-Scale Railroader and O-Scale Trains.  In S-scale there is The S-Scale Resource.
 
Magazines such as Narrow Gauge and Short Line Gazette and others have a high proportion of prototype information along with modeling articles.  Finally, magazines like Trains (Kalmbach) and Railfan & Railroad (White River) deal exclusively with the real stuff.  (See also trainlife.com for Pacific Rail News (1984-1996) and Rail News (1997-99).)
 
A word of caution: don't be depressed by the beautiful models and layouts pictured in all these magazines.  These are the work of folks who have usually been in the hobby for years and have developed the necessary skills.  Use the photos and modeling results as inspiration for your own efforts.  You can get these results, too.  Just don't be in a rush.  Remember, this is a hobby, not a competition, and it should be fun.
 
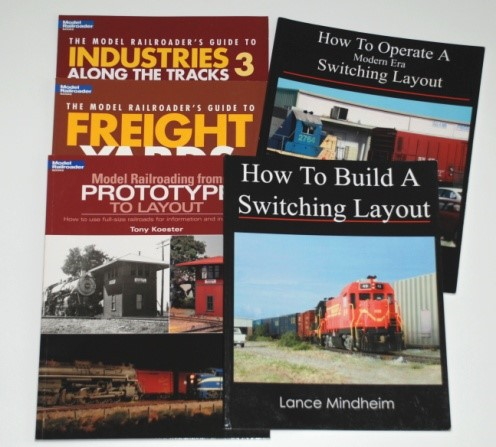
Another excellent source of information is found in the many softcover "How-To" books.  There are publications available on just about every aspect of this hobby.   Many of these books are compilations of past articles printed in the monthly model railroad magazines.  Some are step-by-step construction of small layouts, an excellent way to "get your feet wet" in model railroading.  These project layouts are usually geared specifically for the beginner.
 
Track
For track, there are several options: sectional, flexible and hand-laid.  Good advice is to leave hand-laid for later, as it requires some practice and patience to master. Hand laying involves purchasing rail and ties and bonding the two together using track gauges, glue, and/or spikes/solder.  (See Part 4 of this Guide for more information on laying track.)
 
Sectional track (or set track) is consistent but lacks flexibility.  Flexible track is a good choice but takes some care to put down.  Many of the project layouts use a combination of the two.  Most model railroaders use nickel-silver rail in plastic ties.  In HO, Atlas, Micro Engineering, Peco, Shinohara, and Walthers track products are reliable and look good.  In N, Atlas, Micro Engineering, and Peco make great track.  Poor track and good track poorly laid, especially turnouts (also called switches), lead to derailments and frustration.  You should also note that track is sold in ‘codes’ which indicate the rail height in inches.  In HO-scale, code 100 and code 83 in HO are common; in N-Scale code 70 and code 55 prevail.  Care should be taken not to mix them up.  Micro Engineering does track in codes 83, 70 and 55!  If you use say Code 83 on a main line and want to use a smaller code track on sidings or rail yards, no problem.  Adapting rail joiners can be bought to ensure a smooth transition between different code track.
 
Regardless of the manufacturer, regular cleaning of rails is essential.  Do not use steel wool or sandpaper.  For oxidation (and scenery spills), use a solid cleaning block.  Life-Like, Peco and Walthers make good track rubbers.  Although more expensive, Atlas and Centerline Products make excellent track cleaning cars in a variety of scales and gauges.  These are a great choice for larger model railroads.  Alternatively, and this is the best practice as some of the above have a degree of abrasive, use cleaning fluid rubbed on using a fine cloth – no abrasions and thus no dirt traps!  A low-pressure vacuum will not go amiss either.  Wheels on locomotives and cars will also need to be cleaned occasionally.  It is also recommended that you use metal wheels on all freight and passenger cars as plastic wheels not only attract dirt through static electricity but also deposit plastic on the railhead over time.
 
Power Supplies
Without proper control, our trains remain static displays.  Almost all model trains today run on 12-volt DC power.  This is provided by a transformer or power pack that reduces the AC voltage in your home.  Like motive power, cheap power packs do not perform well and lead to frustration.  Power packs come in different forms: integrated transformer and controller; separate transformers and controllers; handset controllers and plug-in panels etc.  A visit to your local hobby store or careful online research is essential to see what meets your needs and your wallet.
 
You might also consider going straight into DCC (digital command control) where you drive each locomotive independently.  (See Part 5 of this Guide for more information on adding power to your model railroad.)  Since this involves a significant investment, not only in the control system but also decoders to fit into locomotives, guidance should be sought from fellow members in your area and of course the local hobby store if they supply DCC.  Like rolling stock and locomotives, there are various suppliers of DCC products.  Whilst many will carry NMRA conformity certificates you cannot use all products across manufacturers – generally, you have to opt for one manufacturer’s control equipment including all handsets but they should be able to operate all locomotives regardless of whose decoder is installed – there can be exceptions but again take advice from fellow members.  Each will have their own preference.
 
Locomotives
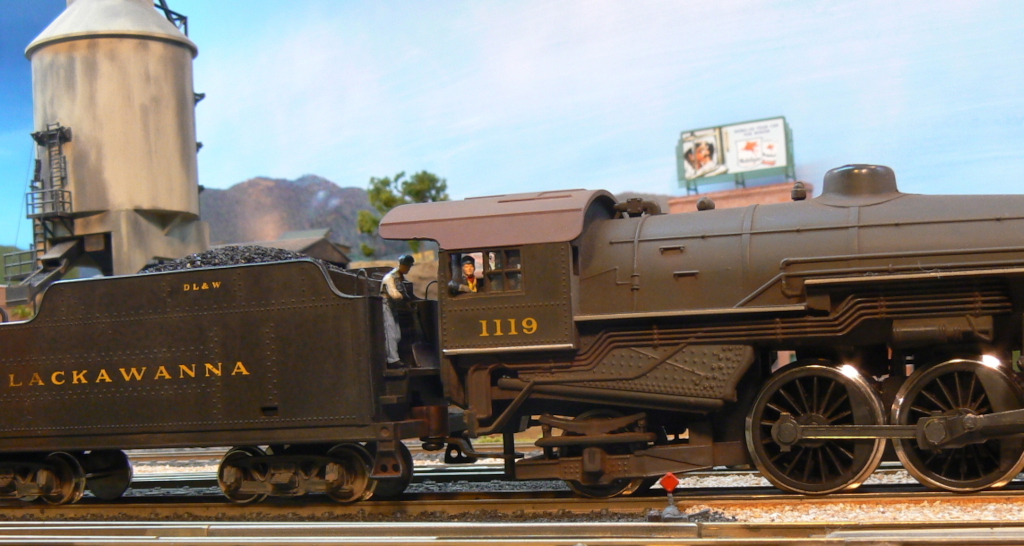
Your motive power (locomotive) is one of the most important pieces of equipment you will buy.  Without it, your trains won't move.  It should run smoothly, get good pickup from the rails and have a good finish.  For HO-scale and N-scale diesels, engines by Athearn, Atlas, Bachmann, Bowser, Kato, and Walthers fill the requirements.  There are many other makers of motive power, so it is always best to test-run any locomotive before purchase.


Steam engine enthusiasts, as opposed to diesel enthusiasts, must choose their motive power carefully, as the complex mechanisms of a steam locomotive can be finicky.  If you choose a steam locomotive, be sure it runs well and compare it to others before buying.
 
If that choice was not hard enough, you also need to be aware that most model locomotives manufactured today are sold with the option of DCC-ready or DCC-equipped.  The DCC-ready locomotives will run on DC track but easily accept DCC components.  If you want to run locomotives with sound, DCC is your best option but some manufacturers’ locomotives run with sound, albeit a little limited, in analog or DC mode.  Again, seek guidance at your local hobby store or from fellow members before you commit to buying.  (Part 8 of this Guide has a greater focus on Motive Power.)
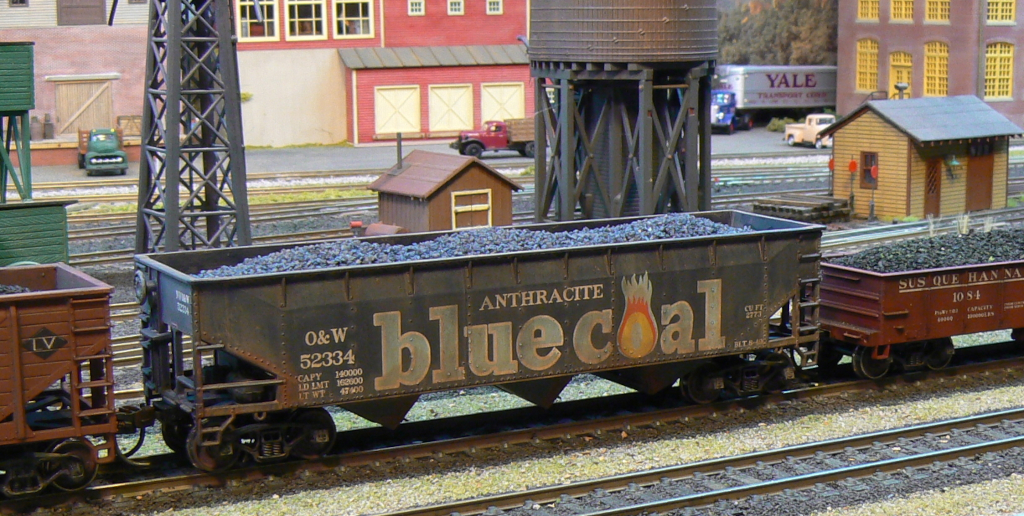
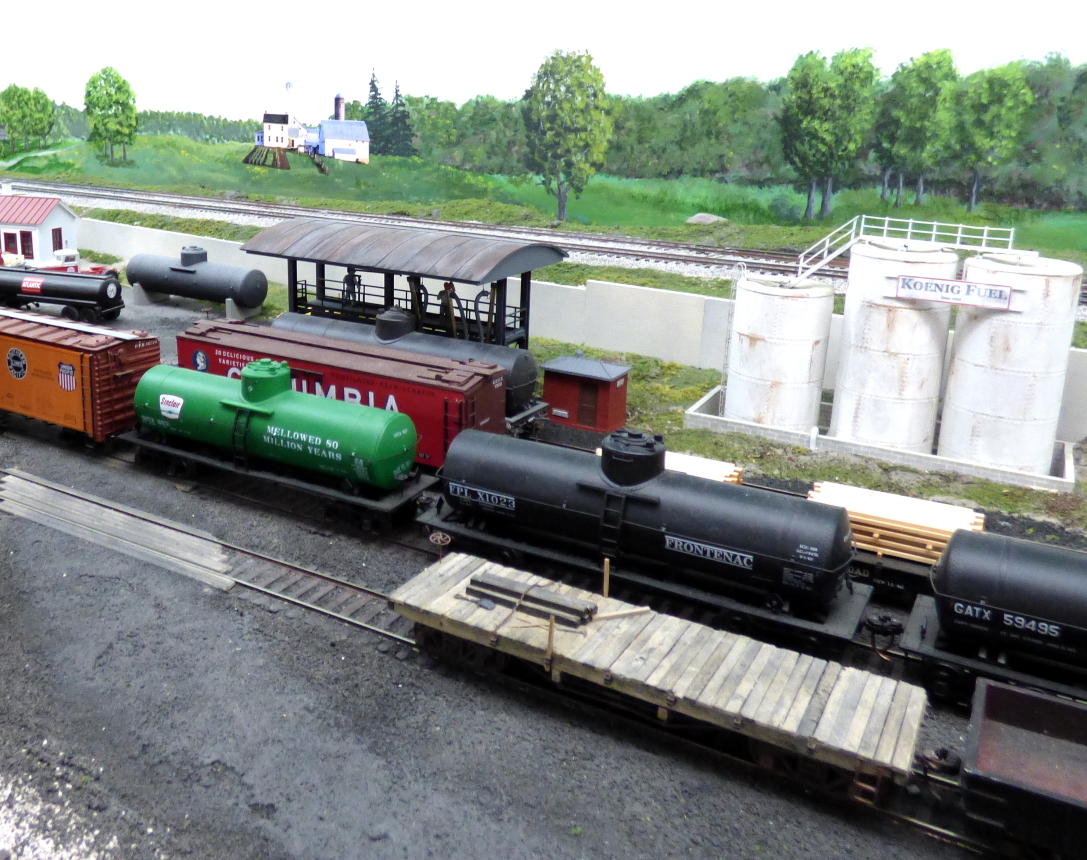
 
Rolling Stock
There has been a revolution in the way rolling stock is now offered for sale.  Fifteen years ago, all HO stock was in kit form, either “shake the box” kits, with just a few details to add, or craftsman kits where all parts require assembly and a higher degree of skill is needed.  Today virtually all rolling stock in all the popular gauges/scales is offered in “ready to roll” (R-T-R) form.  Indeed, there is a wide degree of quality within that also with at one end fairly basic and robust freight cars and at the other end far more detailed and delicate models that resemble competition standard cars.  You can even obtain R-T-R freight car models in narrow gauge today!
 
HO manufacturers include Accurail, Athearn, Atlas, Bowser, Exactrail, Intermountain, Kato, Tangent, and Walthers.  In N -cale you have Athearn, Atlas, Bowser, Intermountain, Kato, Con-Cor, and MicroTrains.  There are other manufacturers but these are the main ones.  Some kits are still available, usually from manufacturers who produce more obscure or specialized cars.


These still require a higher degree of skill to assemble.  Passenger cars are not forgotten with many quality products available from manufacturers such as Athearn, Rapido, and Walthers – the latter even produces complete trains on an annual basis as a theme for the year.
 
For both rolling stock and motive power, it is good advice to look closely at the couplers that come with the kit or R-T-R product.  Almost all HO-scale model railroaders use a "Kadee-equivalent" coupler that looks like prototype couplers.  Most manufacturers now supply them, or an equivalent, as standard.  Kadee also makes couplers in almost every scale and gauge, from N to G, but they are not used as universally in other scales as they are in HO.  By following the directions, it is easy to replace the kit-supplied coupler.  These Kadee couplers work consistently, provide for easy uncoupling, and are much more realistic.  MicroTrains supply a similar coupler to the Kadee in N scale which is proving very popular.
 
To further improve the operation of rolling stock and locos, learn how to gauge the wheels with an NMRA standards gauge.
 
Consider using a Kadee coupler height gauge to set the correct elevation of each coupler, too.
 

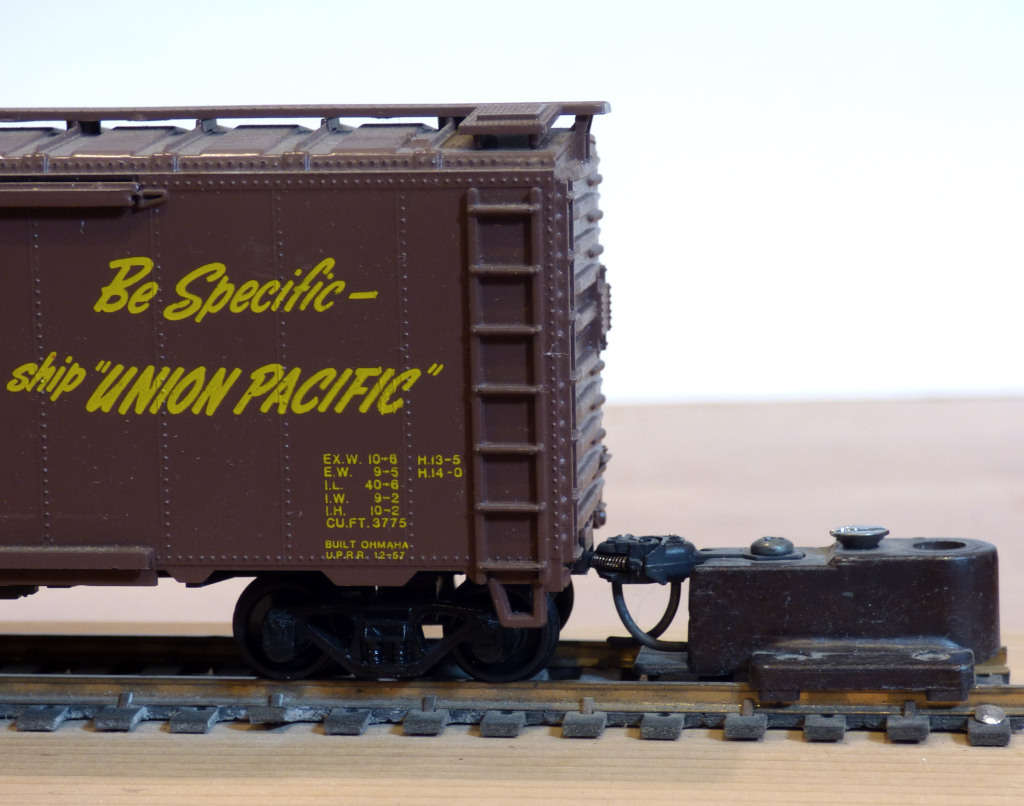
Photo: Testing the coupler height on a boxcar using the Kadee gauge.
 
Again, enlist fellow modelers for this.  (More information on rolling stock can be found in Part 8 of this Guide.)
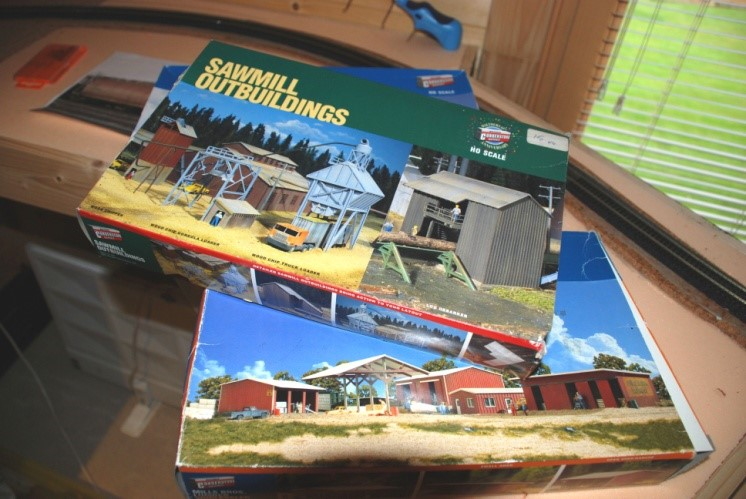
 
Buildings
Structure kits are as varied as the modelers that buy them.  Materials encountered in most kits include plastic, wood, some metal, and plaster.  Most advanced kits have a combination of materials.

 
Start with easy-to-build plastic structures.  Wood kits are usually more difficult to construct and finish.  In both HO and N, Walthers makes many fine plastic buildings. Design Preservation Models (DPM), Smalltown, and PikeStuff also produce easy-to-build, good-looking plastic buildings in several scales.  Leave "craftsman" kits alone until you are confident of your skills.  Choose buildings that appeal to you.  That said, you can also buy some buildings made up from Walthers and Woodland Scenics, for example.  (A more complete discussion of Structures can be found in Part 7 of this Guide.)
 
Scenery
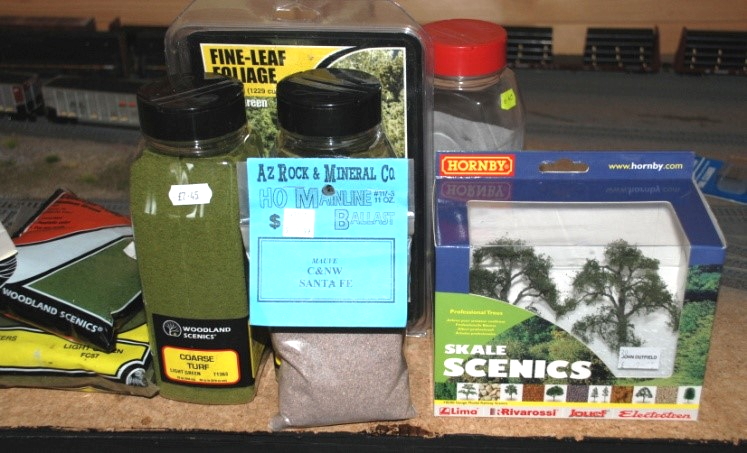
Scenery is one area where the beginner can almost count on to be bullet-proof.  By using the traditional methods of plaster and ground foam as discussed in many of the how-to books and videos, you can make excellent scenery.  Woodland Scenics makes a full line of easy-to-use materials for scenery.  You will find Woodland Scenics in many model and hobby shops.  Other suppliers include Scenic Express and Arizona Rock & Mineral.  Browse stands at shows and meets to get an idea of what is available.  Natural materials such as dirt and weeds can also be used quite effectively.  If you use dirt, sterilize it first by baking in an oven!


Scale trees can be purchased or made as desired.  Ready-made trees and materials for making trees are available from many vendors.  One big advantage of N-scale is that scenery can be made to dwarf the trains.  Scenery in the larger scales takes a lot of room.  Real plants and water can be used for outdoor, G-scale railroads.
 
Since scenery is one area that most model railroaders have to scratch build, scenery can appear to be intimidating.  Don't let it be.  If your scenery is not quite right, bash it out and start over since the materials are not expensive.  Remember, scenery is the stage on which your trains perform.  (Part 6 of this Guide is dedicated to Scenery.)
 
Tools
A craftsman is as good as his tools.  In model railroading, tools can help you in many ways.  Your tool chest will grow as your experience grows.  A basic toolset for the beginner should include needle-nose pliers, tweezers, several sizes of small paintbrushes, clamps, a hobby knife (such as X-Acto or scalpel), small files, rubber bands, and small screwdrivers in several sizes.  Larger tools should include a quarter-inch drill, a soldering iron, and a jigsaw.  (Part 11 of this Guide covers a wide range of useful modeling tools.)
 
Adhesives include plastic solvent glue, cyanoacrylate glue (super glue), white glue, and epoxy.  Acrylic-based model paints such Testors' Accuflex and Badger Modelflex clean up with water and are non-flammable.  Scalecoat and Tru-Color are solvent-based.  You should consider a permanent workbench that can be left undisturbed while adhesives and paint dry.  The dining room or kitchen table isn't a good location.
 
Putting It All Together
The goal for most model railroaders is a layout.  Track, motive power, rolling stock, structures, power pack, and scenery all combine as actors in our stage play, the layout.  Whether you envision an oval of track, a switching layout, or an empire, you need a plan.  Layout planning will be covered in Part 2 of this Guide.  The best advice for beginners is to start small and be willing to discard initial layouts.  Don't be afraid to make mistakes.  A 4x8-foot layout or an 8x2 modular setup is a good size to start with in HO- and N-scales.  You can build a bigger model railroad later.  (Part 3 of this Guide describes ways to build the foundation for a layout: benchwork.)
 
Practice all the model railroad techniques like benchwork construction, wiring, kit building, and scenery on this small layout.  Temporary layouts set up on carpet usually don't work well.  Another way to learn is to join a group or club that has a layout in your chosen scale.  There will probably be experts available that will teach you model railroad basics using a hands-on approach.  Don't be shy, introduce yourself, and learn from the group's members.
 
How you plan and then build your layout determines, and can be determined by, how you want to run your layout.  Do you primarily want to run complete trains through beautiful scenery or do you want to do a lot of switching?  Are you interested in simulating prototype railroad operations?  (Part 9 of this Guide offers options and suggestions for different ways to operate your model railroad.)
 

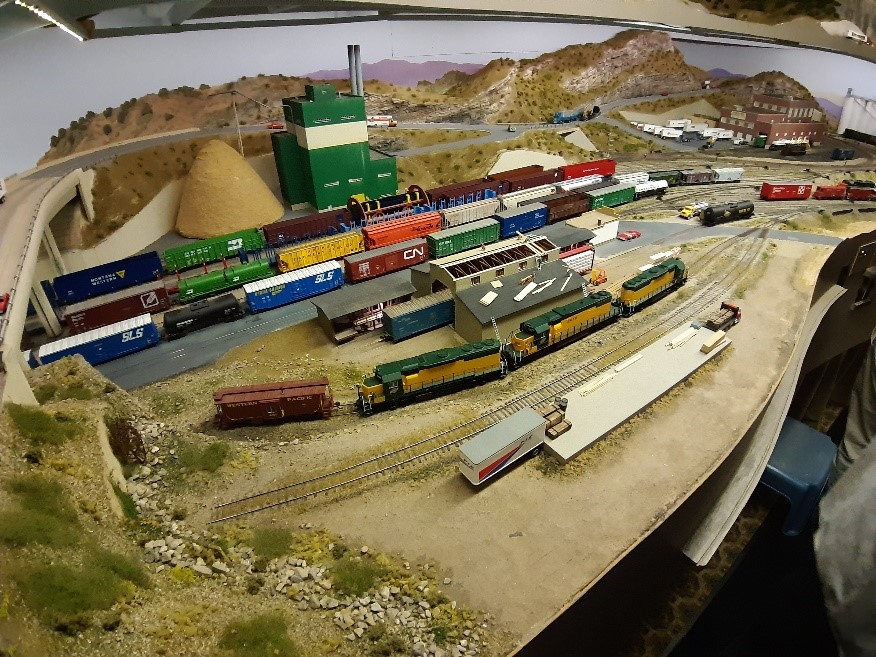
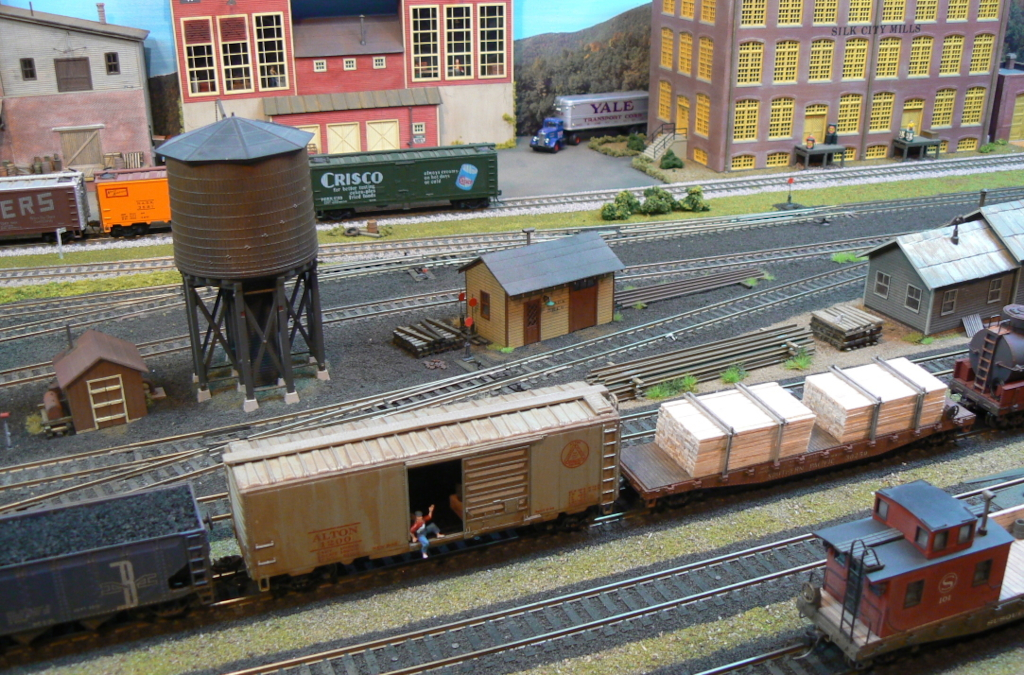
Putting it all together – a scene on Bruce DeYoung’s Jersey Highlands Railroad
 
Another popular method to learn model railroading is to construct a module in your chosen scale.  This has become quite popular over the last twenty years, and many NMRA Divisions have modular groups.  With modules, each member owns their small section of railroad with standard interfaces.  These are assembled together with others to make a finished layout.  Modules enable a modeler to try techniques and learn on a small "layout" before attempting a more permanent layout.
 
With a few recommended practices, some "good advice," patience, and a willingness to learn, the beginning model railroader can have fun in a lifetime hobby.  And, the NMRA will be beside you helping with standards, expertise, and resources.  The best part is being united with other like-minded individuals dedicated to expanding the fine hobby of model railroading.  Remember they started just where you are today.
 
Welcome aboard!
 
Credits
[Editor’s Note: This part is based very closely on an article by Doug Geiger MMR (NMRA Rocky Mountain Region) published in the July 1996 NMRA Bulletin and is reproduced and updated with his kind permission.]

Scales & More

Scale & Gauge

As you get into deciding just what you want in the way of a model railroad, the question of scale comes up. Do you want HO or N or maybe O or S? Perhaps you want one of the Garden Railroad scales or gauge or... Well, what is scale and gauge for that matter? Briefly, scale is the ratio of the model to the real thing or 'prototype'. Gauge is the distance between the rails unless you are thinking 'Tinplate' or 'Scaleplate' like Lionel®, Marx®, American Flyer® or MTH® among others. Confused? Ah, well, let's look at scale first.

Scale implies that is it a scaled down version of the real thing. O scale used to be called 1/4 inch scale with the ratio to the real thing as 1:48 with HO being 1/8 inch scale and 1:86 or 1:87. That makes it simple except that there have been some subtle changes in HO and it is now 3.5 mm and 1:87.1. How about N scale? It is 1:160. Let's just look at size. O is the larger of the traditional scales. Lionel is O27 for example and is not truly O scale. S is smaller than O and came from American Flyer. HO is the next size and has been referred to as Half O with N scale being about half of that. And then there is Z. Z is small, really, really smaaallll at 1:220.

The following photo will give a good visual comparison between two of the scales - O and HO.  As you can see from above, HO scale is about half of O scale.  In fact, it is said that historically, the name "HO" was insipired by it being "Half O".  Even though every linear measurement in O scale is about twice the same measurement in HO scale, remember that each measurement in a 3-D item in O scale is twice that in HO scale. (i.e. length, width, height)  So, for example, the volume of a structure in O scale is actually eight (8) times that of the same structure in HO scale.  That is an important factor to remember when considering space requirements for each scale.  The structures in this photo are virtually the same, only one is built in O scale and the other in HO scale.  Thanks to George Downer of the Tidewater Division for both the photo and for building the structures!

In both HO and N scales, there is a large selection of quality products available with S scale growing rapidly. The selection of scales is up to the modeler. With N scale, you can have those long trains like the prototype runs through landscape that actually dwarfs the trains if that is what you wish. HO is said to be a better operating scale that allows almost trouble free switching for those way freights, locals and yard switching operations. In fact, there can be layouts that do all of these things in any of the major scales. The larger the scale, the more room it takes for an extensive layout. The question of scale depends somewhat on what you want your railroad to do. One thing I feel that I should mention at this point is that you cannot have twice the N scale railroad on a 4x8' as an HO. They do not scale out exactly and both have requirements that make you design the railroad to fit the space rather than using the other scale's track plan exactly. I have not mentioned OO and TT. They are minority scales in the U.S. but each has their advocates.

Well, then, how about gauge? Gauge is the distance between the tracks. Normal track gauge is 4' 8 1/2" between the rails. Using HO as an example, HOn3 means HO scale, narrow gauge, 3' between the rails. HOn2 would be HO scale, narrow gauge, 2' between the rails. HOn30 is a little different as that is HO scale, narrow gauge, 30 inches between the rails.

This photo shows some dual guage track in HO and HOn3 with a  standard HO scale truck and an HOn3 truck on the tracks for comparison.

S scale narrow gauge is growing because you can put a nice size narrow gauge layout into a space not much bigger than a modest HO layout. With the release of Bachmann's On30 train set, a number of modelers have jumped on it as they can have O scale people and buildings with smaller trains that run on track about the size of HO. As you get older, you sometimes appreciate larger cars and buildings. And of course if you really want larger cars, people and buildings, you can take a look at the various Garden Gauge scales.

For more technical information about scales and proportions, you can read Standard S-1 Overview. S-1 is a part of the NMRA Standards that help determine the ability of your cars and locomotives to interchange with other modelers' cars and locomotives in the same scale. Below I list some of the common scale's scale and proportion.

SCALE SCALE to FOOT PROPORTION
O(17) .266" (6.75mm) 1:45.2
O,On3,On2 .250" (6.35mm) 1:48
S,Sn3 .188" (4.76mm) 1:64
OO 4.0mm (.1575") 1:76.2
HO,HOn3,HOn2 3.5mm (.1378") 1:87.1
TT, TTn3 .100" (2.54mm) 1:120
N, Nn3 .075" (1.90mm) 1:160
Z .055" (1.39mm) 1:220

You will hear terms like Proto87 and 'Finescale'.  They are very much a part of the scale that they refer to, but reference differences in track and wheel standards and practices, see the Proto Standard for the details. 

Lastly, we return to O27 gauge trains.  The trains that we commonly refer to as 'Tinplate', 'Hi-Rail' or 'Scaleplate' run on track that doesn't scale out to the real thing for the size of the trains. Many times, the train cars and locomotives are shortened versions of scale.  There is nothing wrong with building a layout around this equipment and there are a large number of layouts around the country using 3-rail track and 'Tinplate' or 'Scaleplate' type of equipment.  They are model railroads.  They are just not 'scale' model railroads in the same way that HO and N are.

Pages